Plastic Braiding!
Here are the steps for how to cut and braid plastic bags. The braiding method is used to make the ropes used for almost all of the crafts, including the plastic jump rope, dog leash, and coasters! You can modify the thickness, length, and color of your rope by changing the number and type of bags you use.

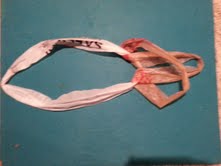
Step 1: Lay plastic bag flat. cut off handles and bottom seam. Recycle or set scraps away to be used to make smaller braids. You will now have a rectangle or square bag with no bottom or handles.

Step 2: Cut the bag into strips of desired thickness. Make sure to cut from seam to seam so that you end up with circular loops instead of unconnected strips. Smaller strips equate to thinner rope and larger strips result in thicker rope. You can lay multiple plastic bag squares/rectangles down at once to cut multiple at a time!

Step 3: Take your cut loops and lay them so that one overlaps with another.
Step 4: Tie the loops together by taking the bottom half of the the bottom loop, folding it up over the top loop, and weaving it below the top half of itself.

Step 4: Pull the bottom bag through so that you get a knot connecting the two loops. Add as many bags to the chain as you would like.

Step 5: Repeat steps 1-4, 3 times so that you end up with a total of 3 chains of equal length. Hook one end of each of the chains under a table or chair leg and separate so that the 3 chains can be braided.

Step 6: Braid your chains together using a basic braiding technique (Right most chain over center chain left most chain over then new center chain, right most chain over new center chain, etc.)
Once you have braided the chains together you can knot the ends. You now have braided rope to either use as rope or to to make into a different use such as a dog leash, coaster, or jump rope!